
If printed ruled lines are misaligned or print results are otherwise unsatisfactory, adjust the print head position.
 Note Note
|
You need to prepare: a sheet of A4 or Letter-sized plain paper (including recycled paper)*
* Be sure to use paper that is white and clean on both sides.
Make sure that the power is turned on.
Load a sheet of A4 or Letter-sized plain paper in the rear tray.
Pull out the paper output tray and the output tray extension.
Hold down the Stop button until the Alarm lamp flashes orange four times, then release it immediately.
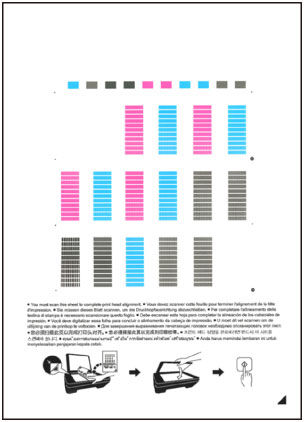
The print head alignment sheet will be printed.

 Important Important
|
Scan the print head alignment sheet to adjust the print head position.
(1) Load the print head alignment sheet on the platen glass.
Load the print head alignment sheet WITH THE PRINTED SIDE FACING DOWN and align the mark  on the bottom right corner of the sheet with the alignment mark
  .
.

(2) Close the document cover gently, then press the Color button or the Black button.
The machine starts scanning the print head alignment sheet, and the print head position will be adjusted automatically.
The print head position adjustment will be complete when the ON lamp lights green after flashing.
Remove the print head alignment sheet on the platen glass.
 Important Important
|
 Note Note
|
Page top |